


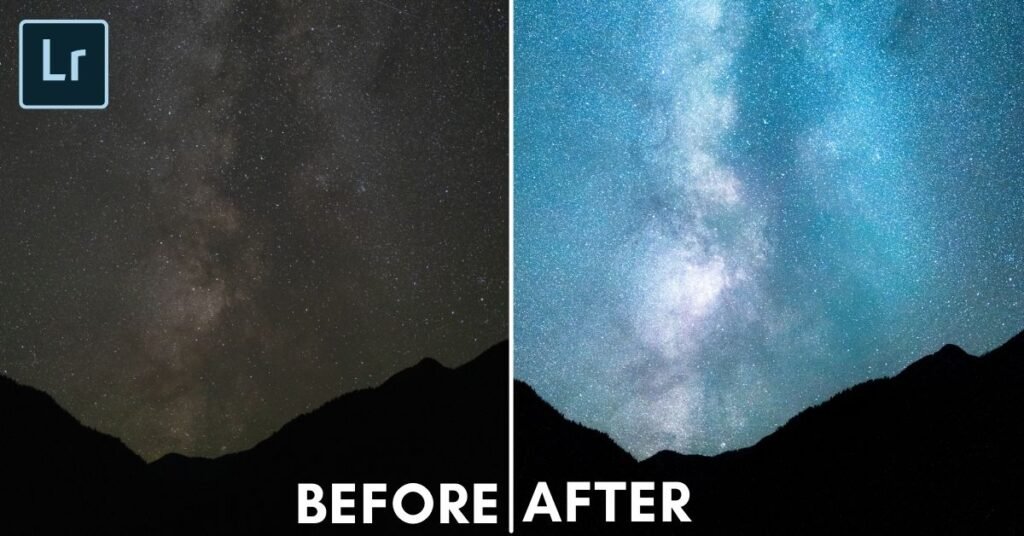
Noise can ruin an otherwise great photo — especially when shooting in low light or using high ISO settings. With AI Denoise in Lightroom Mobile , you can clean up your images quickly and easily, all from your phone.
Here’s how to use AI Denoise in Lightroom Mobile to enhance your photos like a pro — no prior experience needed.
Step 1: Open Your Photo in Lightroom Mobile
- Launch the Lightroom Mobile app (available for iOS and Android)
- Tap the “+” icon to import a photo or select one from your library
- Tap the photo to open it in edit mode
You’ll see a toolbar at the bottom with options like Adjust, Crop, Profiles , and more.
Step 2: Access the AI Denoise Tool
In the latest versions of Lightroom Mobile:
- Tap Edit (pencil icon)
- Scroll down the editing tools until you find Detail
- Tap Noise Reduction — this is where the AI-powered denoise feature lives
Note: If you don’t see these options, make sure your app is updated to the latest version.

Step 3: Apply AI Denoise to Your Photo
Use the following sliders under Noise Reduction :
- Luminance : Reduces graininess without losing sharpness
- Color : Removes unwanted color specks (e.g., red or green noise)
- Detail : Preserves fine textures like hair, fabric, or skin pores
- Contrast : Helps recover depth after smoothing out noise
Recommended Settings:
- Start with Luminance between 10–30 (depending on how noisy the image is)
- Set Color to around 25 to eliminate color artifacts
- Adjust Detail and Contrast to avoid over-smoothing
The AI engine intelligently protects important details while removing unwanted noise.
Step 4: Preview and Save Your Edited Photo
- Tap Done to finalize your edits
- Tap the Export icon (arrow pointing up/right) to save the image
- Choose your preferred export settings (resolution, file format, etc.)
- Tap Save to store the edited photo in your gallery
You can also share directly to Instagram, WhatsApp, or email from within the app.
Tips for Best Results Using AI Denoise in Lightroom Mobile
- Shoot in RAW format (if supported) for better noise control
- Zoom in to 100% view to check noise levels before and after editing
- Don’t overdo the sliders — subtle adjustments often look most natural
- Combine AI Denoise with Sharpening and Dehaze for full post-processing
- Use Presets to apply your favorite noise reduction settings across multiple photos
FAQs: Frequently Asked Questions About AI Denoise in Lightroom Mobile
Q1: Is AI Denoise available in the free version of Lightroom Mobile?
Yes, basic noise reduction is available for free. However, some advanced features may require a Creative Cloud subscription .
Q2: Can I use AI Denoise on old or scanned photos?
Absolutely! AI Denoise works well on older digital photos or scans to reduce digital noise and grain while preserving facial features or textures.
Q3: Does using AI Denoise affect image resolution negatively?
No, if used correctly, AI Denoise enhances clarity and detail. Overuse may cause unnatural results, so always review your edits closely.
0 Comments